

Waking up to a “suspicious activity” email — or worse, finding yourself locked out of your own Gmail — is a sickening feeling. Your Gmail is usually the master key to everything: your social media accounts, your bank, your cloud storage, your password resets. The good news is that Google has one of the best account recovery systems in the world, and if you act quickly and follow the right steps, you can almost always get your account back.
This guide walks you through exactly what to do, from the first five minutes to locking the account down so it never happens again.
Signs Your Gmail Account Has Been Hacked
Before panicking, confirm something is actually wrong. Common red flags include:
- You can’t sign in with a password you know is correct.
- You receive password-reset or security alert emails you didn’t trigger.
- Your sent folder shows emails you didn’t write, especially spam or phishing messages sent to your contacts.
- Unknown devices or locations appear in your account’s recent activity.
- Your recovery email or phone number was changed without your knowledge.
- Contacts report receiving strange links from you.
If any of these are true, treat the account as compromised and start the recovery process immediately — from a device and network you trust, ideally your home Wi-Fi rather than public internet.
Step 1: Try Google’s Account Recovery Page First
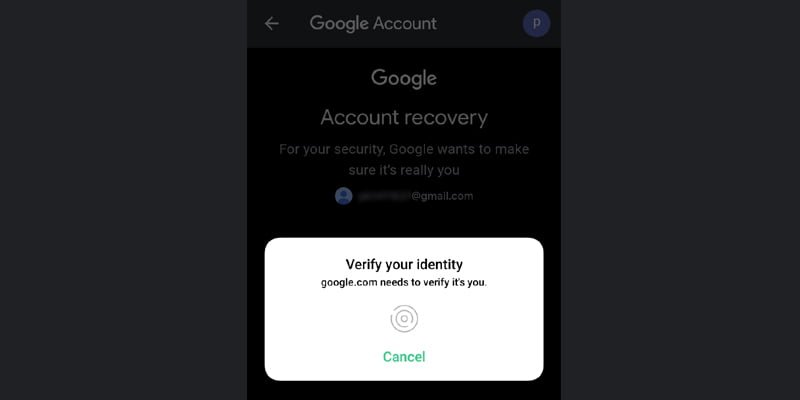
Go directly to Google’s account recovery page (search “Google account recovery” in a fresh browser tab and use the official google.com link — never follow recovery links sent in emails, since those may be phishing). Here’s how to give yourself the best chance:
- Enter your Gmail address and click Next.
- Enter the last password you remember. Even an old one helps — Google asks because attackers often change it, and knowing an earlier password proves ownership.
- Answer the security questions as accurately as you can. “When did you create this account?” — a rough month and year is fine.
- Use a familiar device and location. Google weights this heavily. Recovering from the phone or computer you’ve signed in with before, on your home network, dramatically increases success.
If Google offers to send a code to your recovery phone or email, use it. If the attacker changed those, choose “Try another way” and keep going through the questions.
Step 2: What to Do If You Can’t Sign In at All
If the automated recovery doesn’t work on the first try, don’t give up — and don’t try dozens of times in a row, which can trigger temporary lockouts. Instead:
- Wait a few hours and try again from the same trusted device and network.
- Be precise with dates and answers. If you use Gmail for business, check old invoices or welcome emails on other devices to pin down the account creation date.
- Try the recovery form again with a different path. Sometimes the SMS option fails but the “confirm on your phone” prompt (for Android devices still signed in) works.
In most cases, one or two careful attempts from a familiar device are enough. Google’s systems are designed to recognize the legitimate owner, not to be impossible.
Step 3: The First 10 Minutes After You Get Back In
The moment you’re back in, the attacker might still have active sessions — move fast:
- Change your password immediately to something long and unique. Use a password manager to generate and store it.
- Sign out all other sessions. In Gmail, scroll to the bottom and click “Details” (last account activity), then “Sign out all other web sessions.” Also check your Google Account’s “Your devices” page and remove anything you don’t recognize.
- Check for attacker-added backdoors. This is the step most people skip. Go through: forwarding and filters in Gmail settings — hackers often add a filter that forwards or deletes incoming mail silently; third-party app access (Google Account > Security > Third-party access) — revoke anything unfamiliar; recovery phone and email — make sure they’re yours and add them if missing; app passwords — delete any you didn’t create.
- Run Google’s Security Checkup (myaccount.google.com/security-checkup) and follow every recommendation.
Step 4: Lock the Account Down for Good
Recovery is only half the job. Make the account genuinely hard to steal:
- Turn on 2-Step Verification with an authenticator app (like Google Authenticator) rather than SMS if possible — SIM-swap attacks can defeat SMS codes.
- Save backup codes in a safe place. Google gives you ten one-time codes for emergencies; print them or store them in your password manager.
- Add a recovery phone AND a recovery email, and keep both current. These are your lifeline.
- Use unique passwords everywhere. If the same password you used for Gmail was also used on a breached site, change it on every other account too — that’s likely how the attacker got in.
- Enable alerts for new sign-ins so you’ll know immediately if something happens again.
What If Google Says It Can’t Verify You?
If recovery fails completely, your remaining options are limited — Google deliberately has no human support line for free accounts. But you still have moves:
- Keep trying periodically. Google’s verification models update; what fails today sometimes succeeds next week from the same device.
- Check if you have a signed-in device. An old phone or tablet that’s still logged in is gold — use it to change the password and review security settings directly.
- Warn your contacts that your account was compromised so they don’t click anything the attacker sent.
- Secure your other accounts. If the same password was reused anywhere, change those passwords now and enable two-factor authentication on your bank, social media, and cloud accounts.
The Bottom Line
A hacked Gmail account feels catastrophic, but it’s a recoverable problem in the vast majority of cases. Act fast, recover from a trusted device, clean out every backdoor the moment you’re in, and then harden the account with two-step verification and fresh recovery options. The ten minutes you spend locking things down today can save you from a repeat of the worst inbox morning of your life.